If so, we have something for you! Let us introduce Proof Mode. It is a magic wand that transforms a dusty pumpkin into a carriage.
Why is the check mode needed?
When you plan your life and eliminate the chaos from it, SingularityApp projects and tasks inevitably pile up. But the more different projects you have in the application the harder it is to figure out what has already been done, what progress you have made, what tasks are missing, and so on.
Experienced chaos tamers would say: look back, review the old, add the new. But we advise to just use the check mode! Using it, you can quickly and easily view all projects and tasks and decide what to do next (and whether you need to do it).
How the check mode works
Check mode is a special one in versions for macOS, Windows and in the web version, which helps quickly put things in order, so that later it will not be so painful to clear the Augean stables of what was planned, but not done.
The check mode is like an annual medical check-up — it’s a very useful thing, but voluntary. To run the check mode, you must start it manually. It’s up to you to decide when it is convenient for you to run a check and shake up all your projects.
If you’ve never used it — go ahead, try, it’s easy!
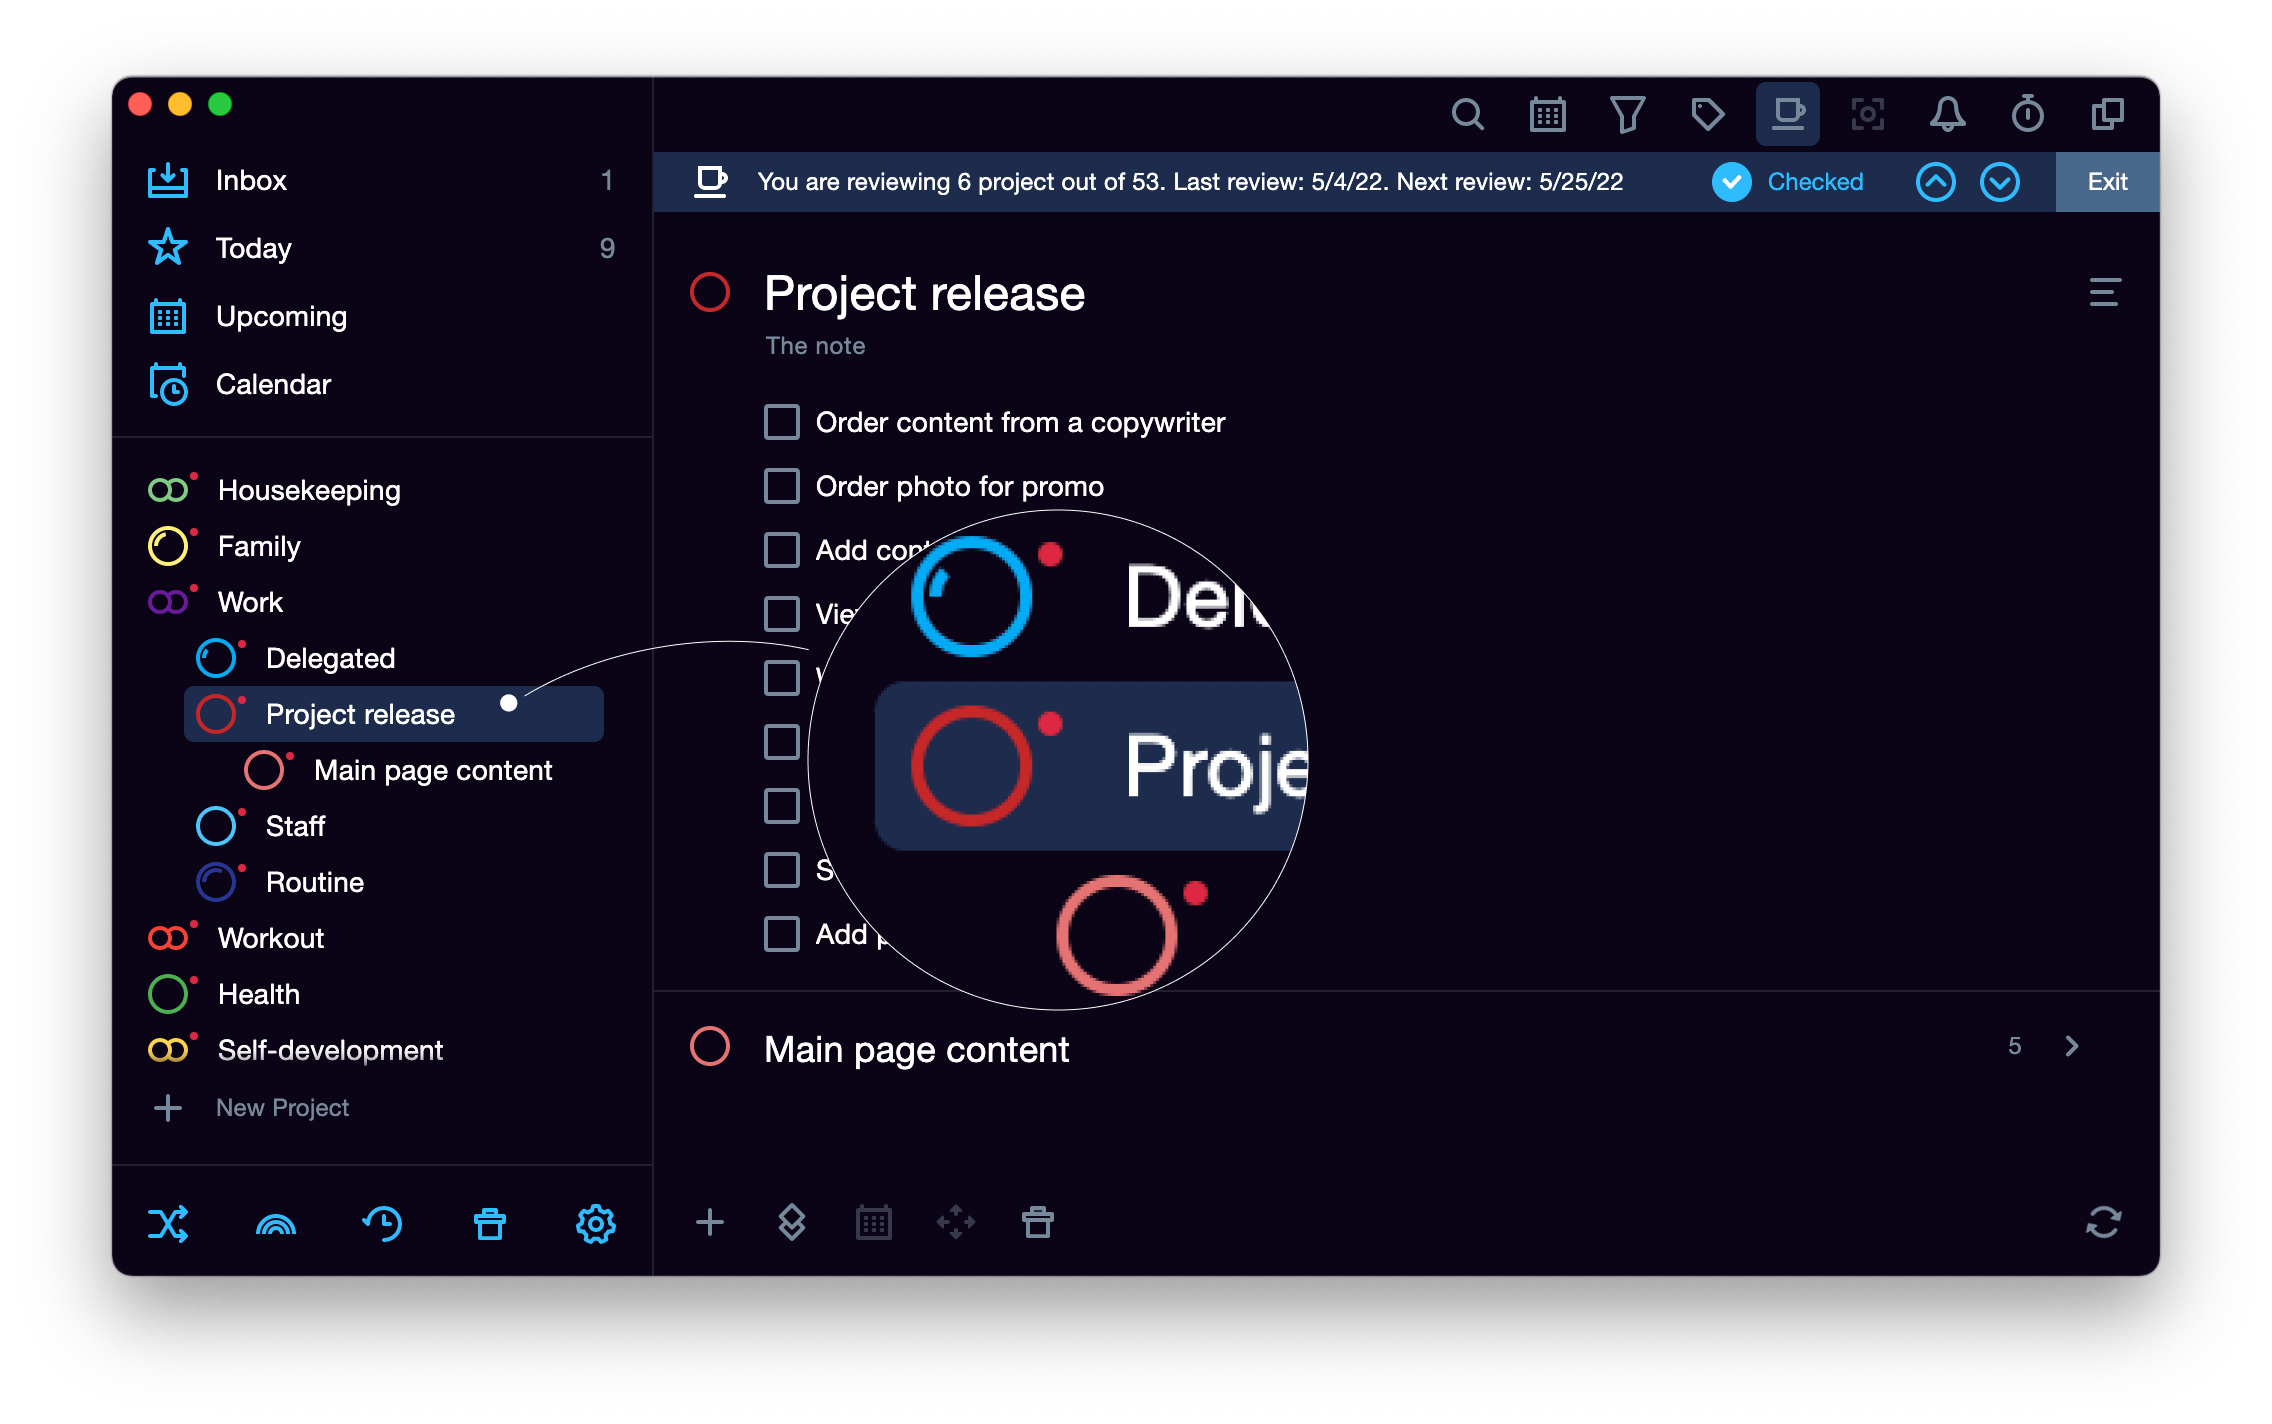
- Click on the icon (that looks like a cup of coffee) in the upper right corner and the application will indicate what projects are to be checked. If a project’s due date is close, the project will have a red indicator in the list of all projects on the left.
- In each project, update the tasks: send the outdated ones to the archive, view the completed ones, add new tasks.
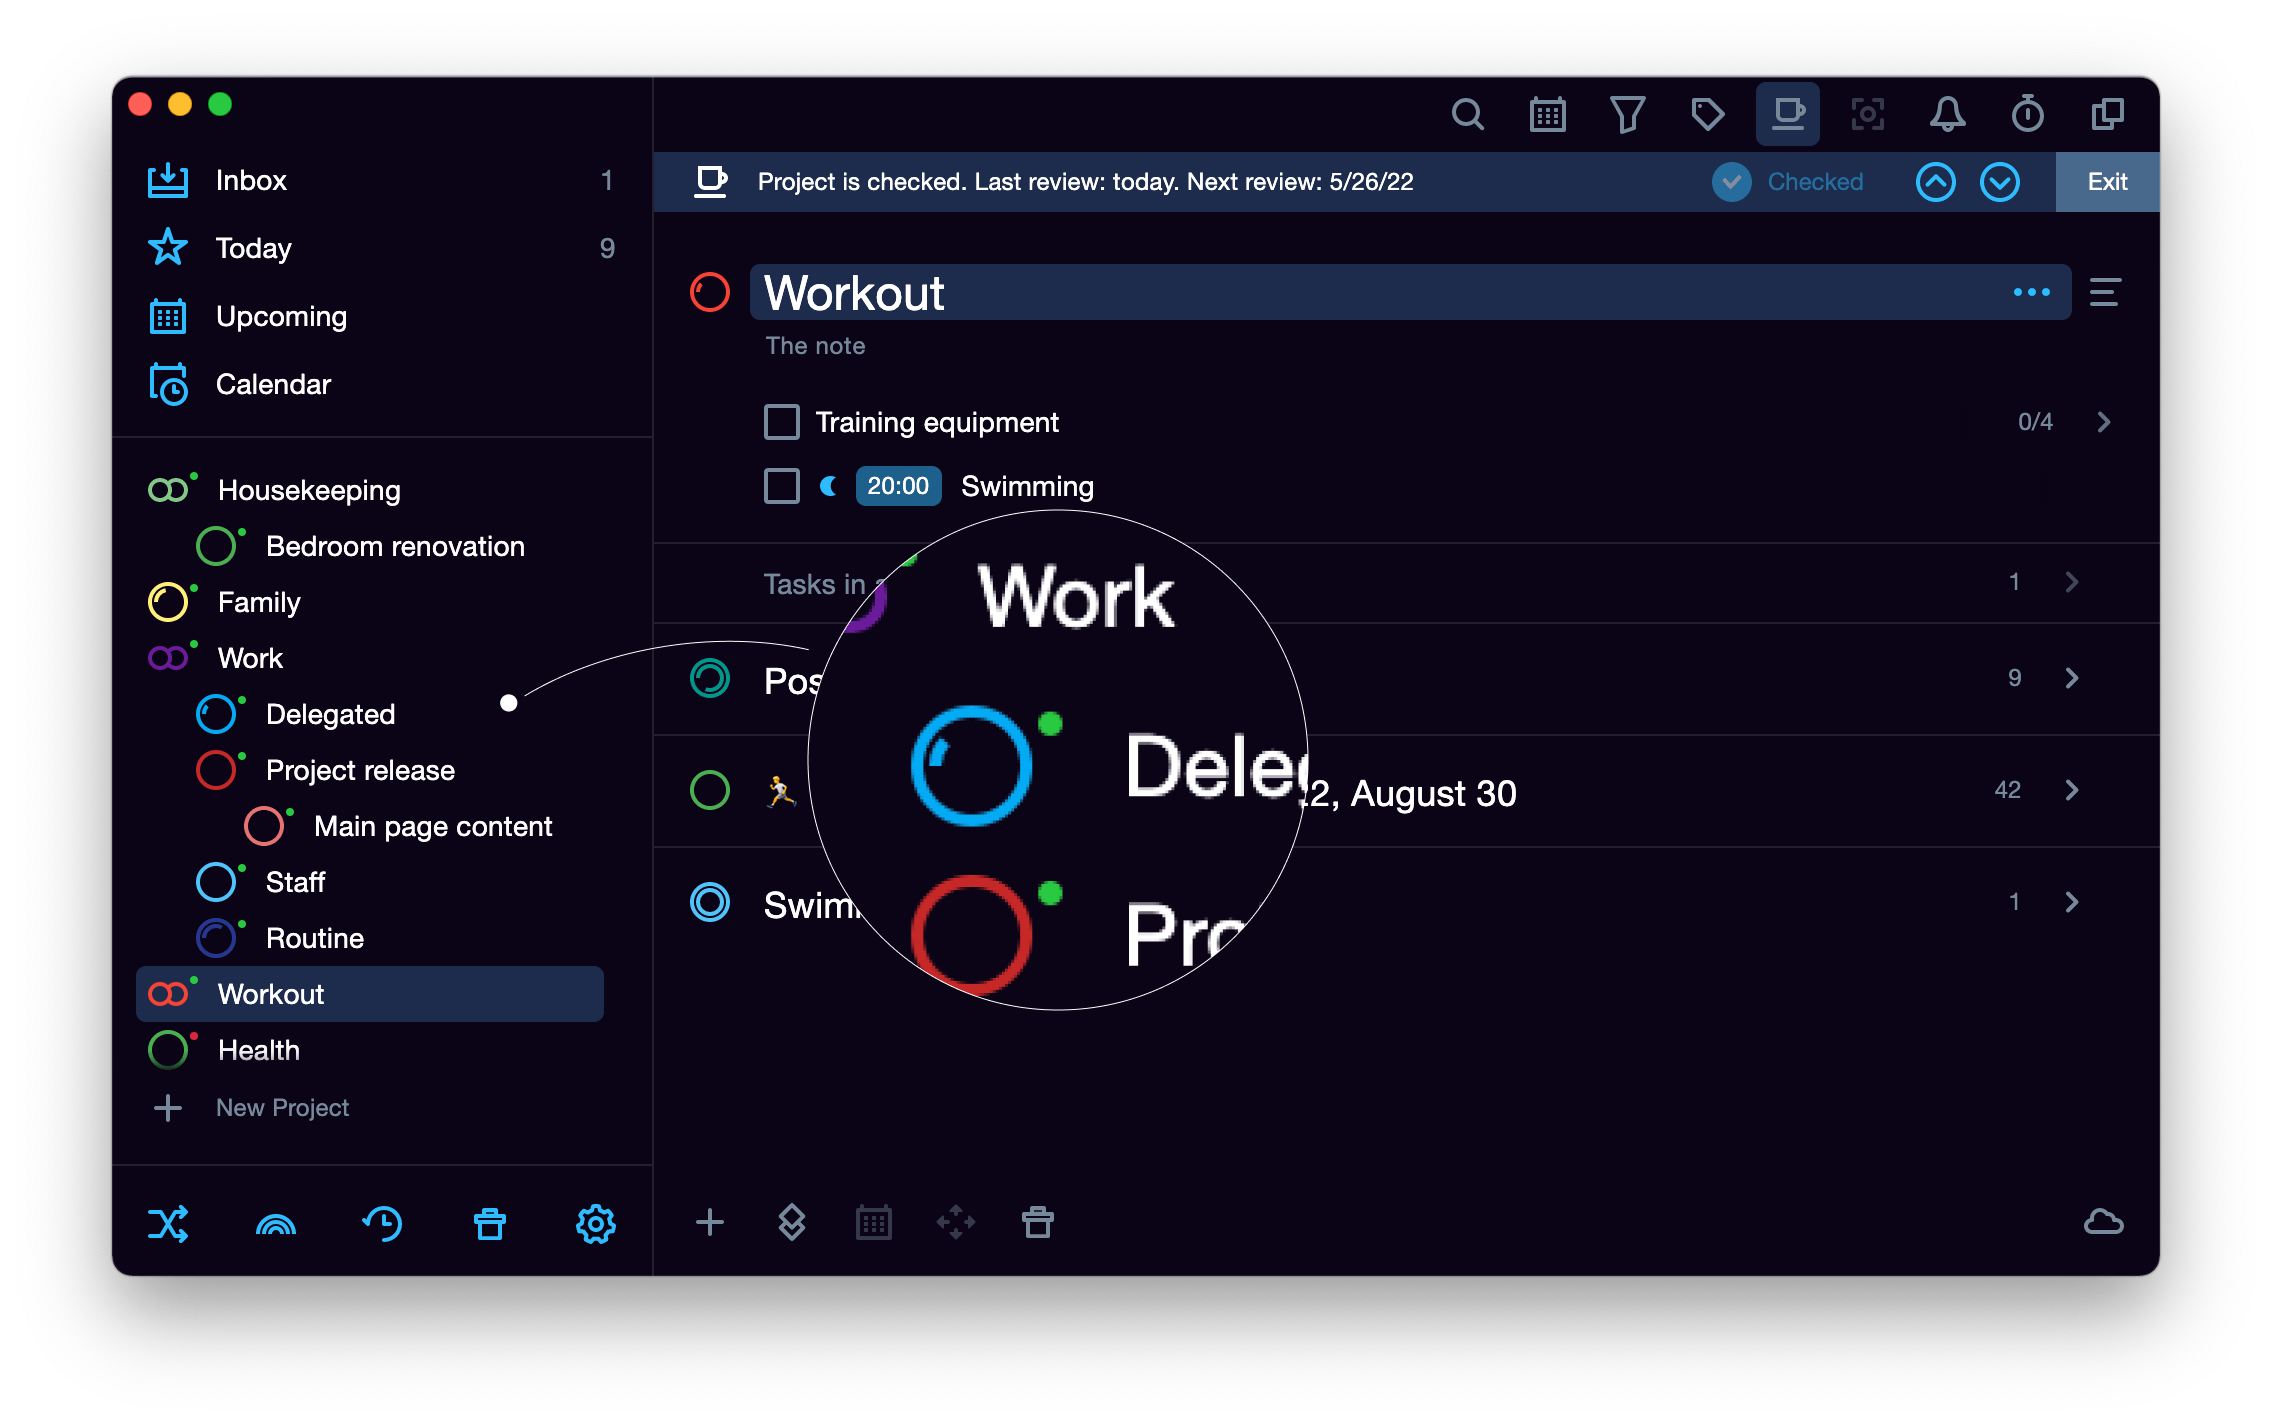
- When the project is checked, click the blue check mark "Checked" on the right of the top bar. The project that has already been checked will change the red indicator to green, and the number of projects to be checked on top of the bar will decrease by one.
- Feel free to move on to the next project and move further down the list of unchecked ones.

In the check mode, projects that should be checked soon are marked with a red dot on the left in the list of all projects. On the right side of the top bar, you can see the total number of projects to be checked

Projects that have already been checked are marked with a green dot on the left in the list
By default, the checking interval is one week, and it starts from the date the new project was created. A newly created project will have a green indicator during a week. It means it’s too early to check it. But after 7 days, such a project in the check mode will have a red indicator reminding you that it’s time to check it.
If you start the check mode, but don’t check any of the projects — it’s okay. When you run the check next time, the red indicator will still be next to the project.
Let’s repeat: checking projects is optional, but we highly recommend using the check mode to keep your projects in order. If, when starting the check, all the indicators of the projects are green, it means that you did the check for all projects on time and now you do not need to shake them up (give five!). And if you want to check less often than once a week — no problem, configure the intervals in your own way.
How to customize the interval for check mode
Default checking interval
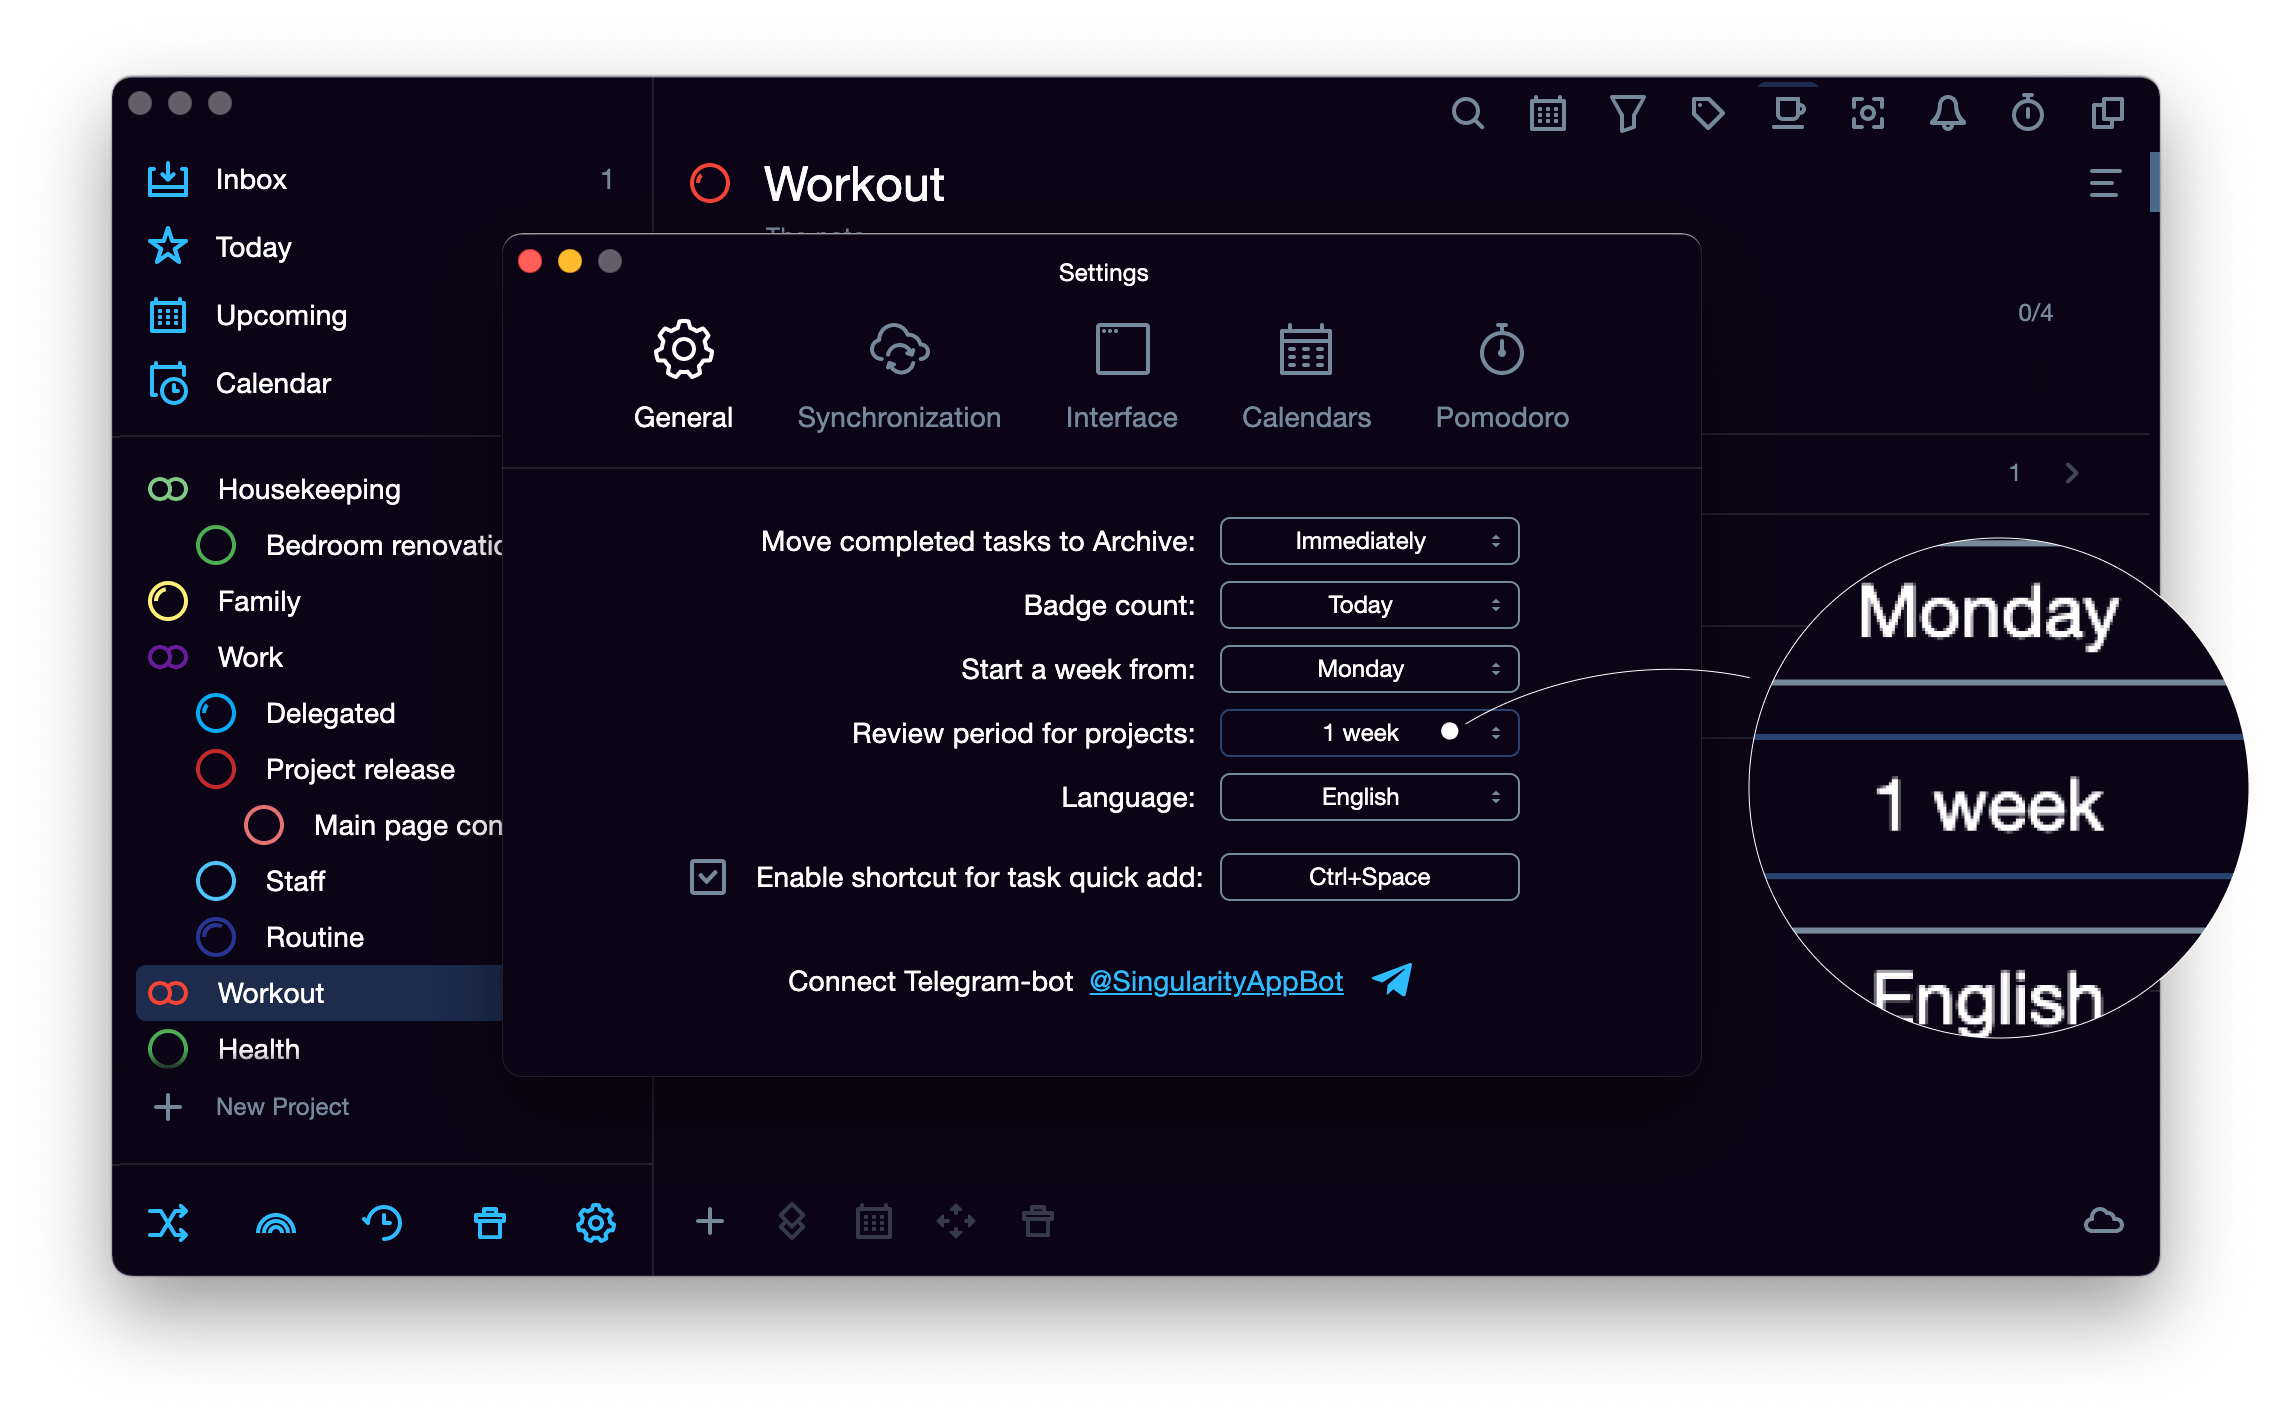
The checking interval in SingularityApp is one week for any project. But you can configure it to be less often — every 2 weeks, once a month, every six months. Or never at all.
To change the default interval for all your projects, go to the application settings (click on the gear icon at the bottom) and select the desired option in the third field on the pop-up that opens:

Project-specific check interval
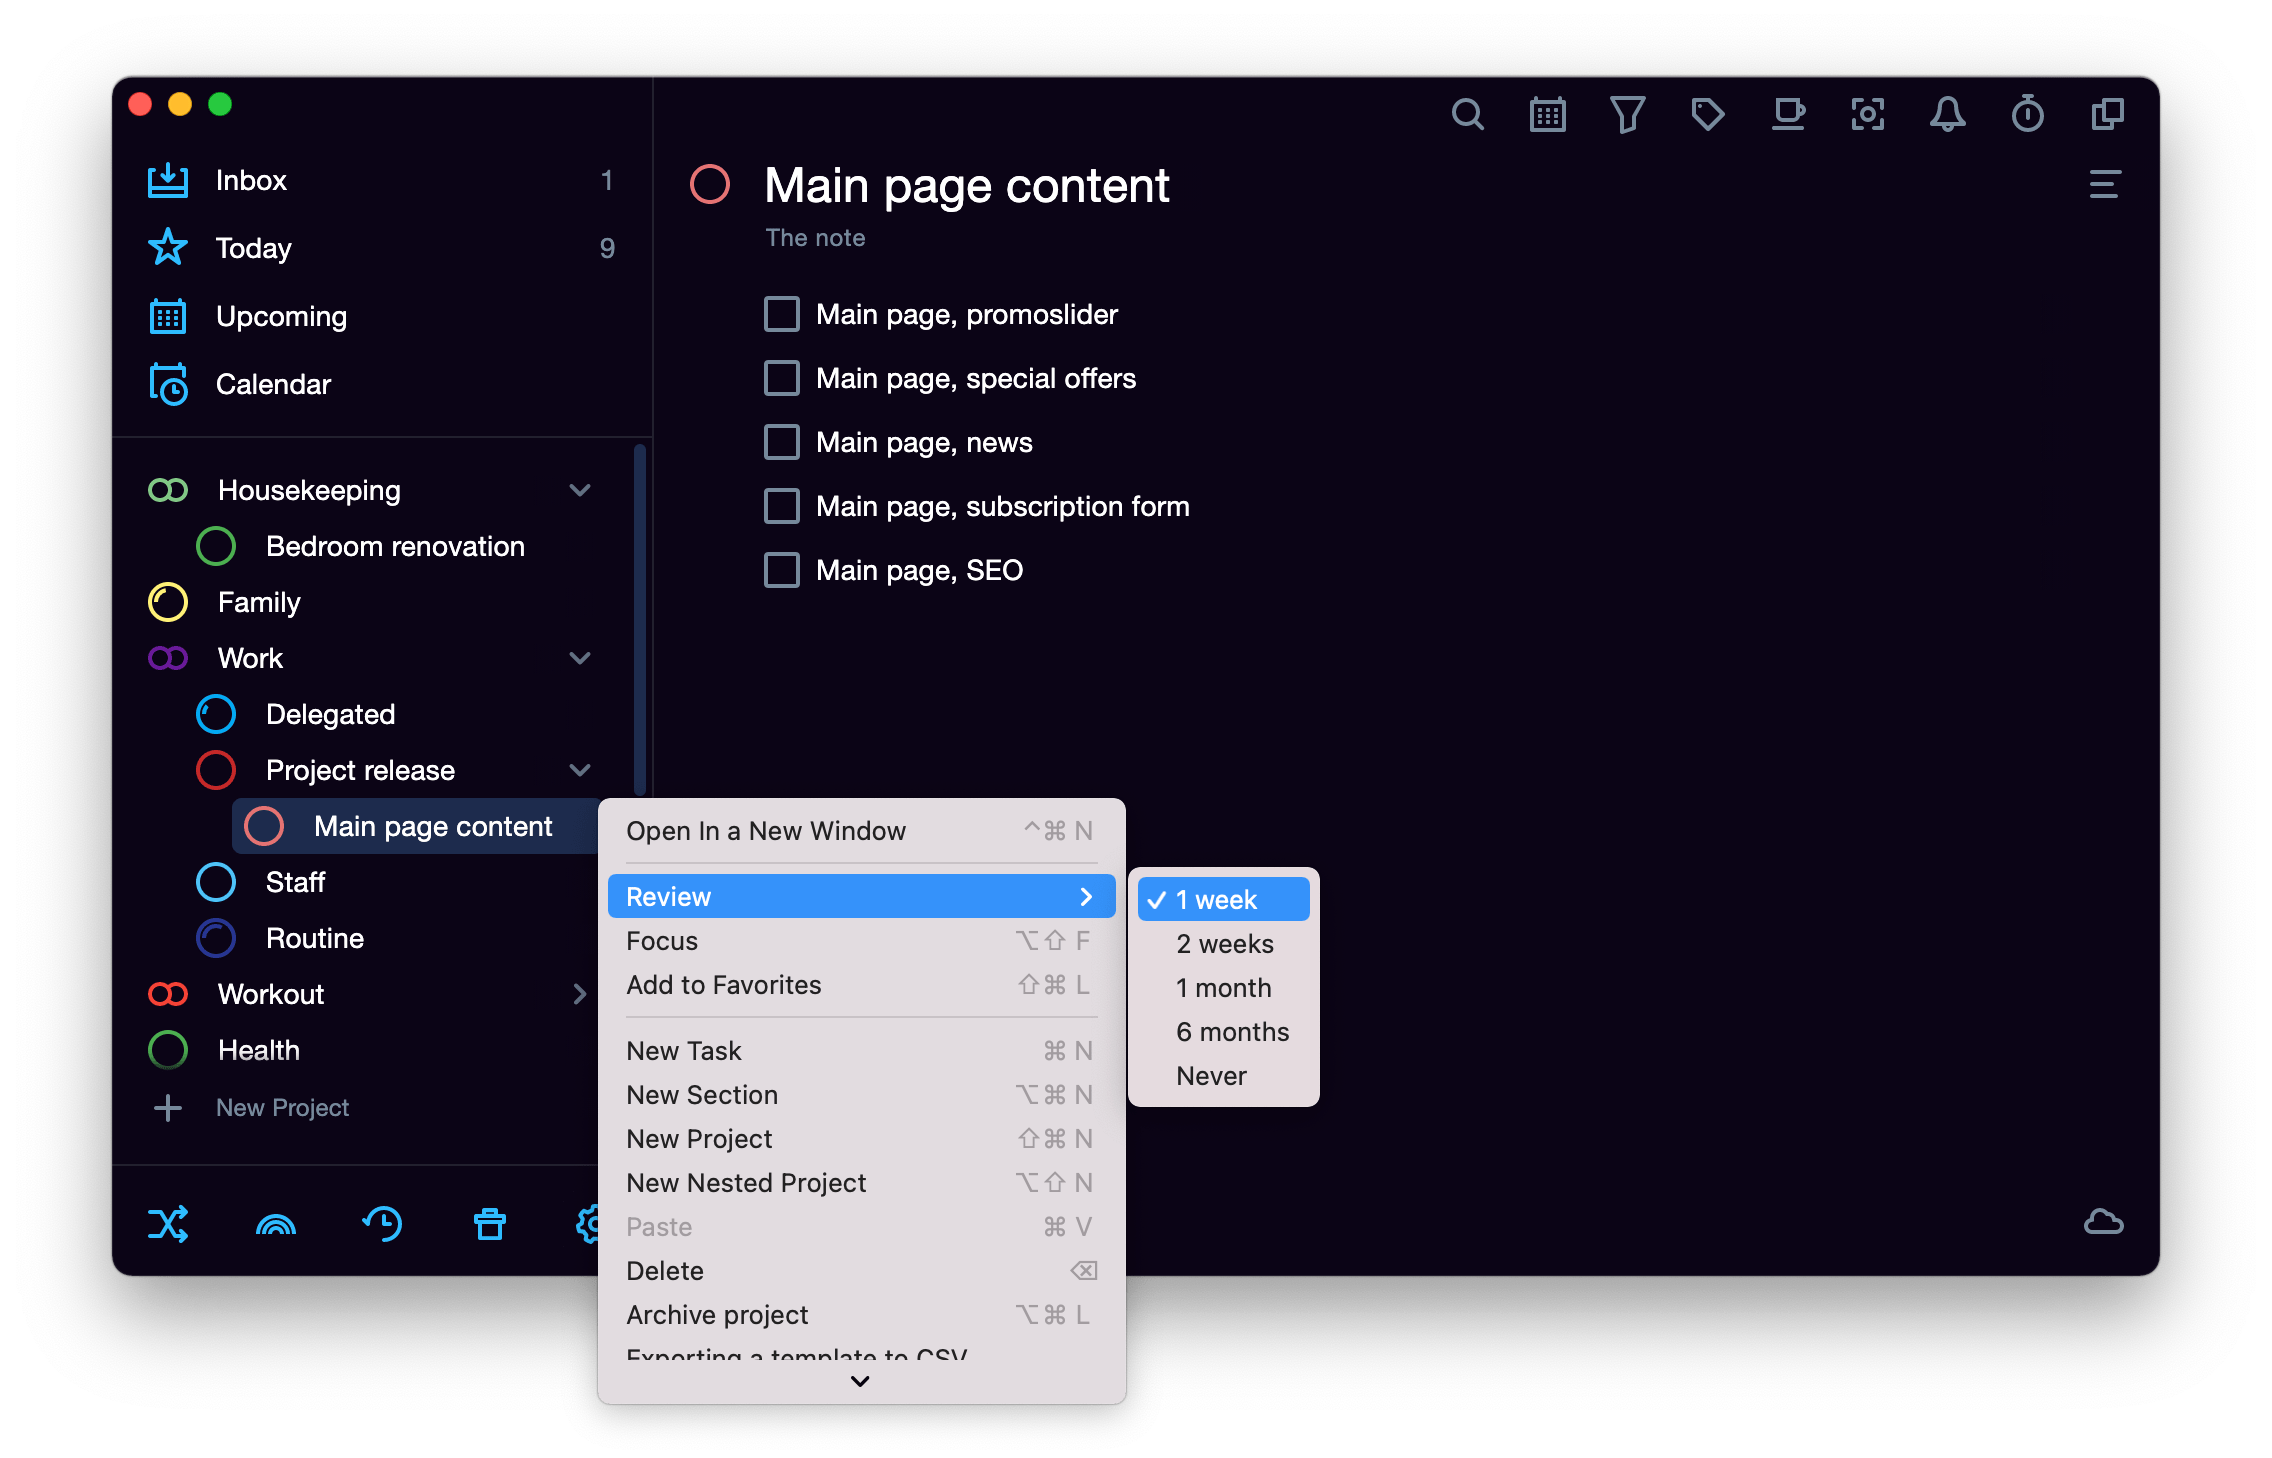
For example, to control your employees' work, you have a specific project that you would like to monitor once a week: the assignment to everyone and the statuses for tasks. And you also have the Learn Foreign Language project that you want to check just once a month. Not a problem — you can configure a specific checking interval for each of them. Just right-click on a needed project in the list on the left, select Check in the pop-up menu and set the interval.

How to change the checking interval for a specific project in SingularityApp
You can read more about the scan mode settings in Wiki.
Important to remember
Check mode is a cool thing for those who have too many projects: it will help you quickly put things in order in the projects that you have not been doing for a long time :) But to make it work even more efficiently, we recommend adding repeating task "Check projects" to your schedule, so surely nothing will disappear or "rot".
And then the anxiety from the projects that have turned into chaos will leave you forever — after all, everything will be under control. And for those who practice the art of small steps, the test mode will give a special feeling of joy. If you run this mode between checking dates one more time, you can see the green indicators and feel how cool you are at controlling chaos.
Projects are waiting for you! But we are not going to say goodbye; we’ll see you when we release cool new features!


